
Why Is My Ductless AC Leaking Water?
July 13, 2026 | Category: Air Conditioner, Air Conditioner Repair Service, Ductless, Maintenance
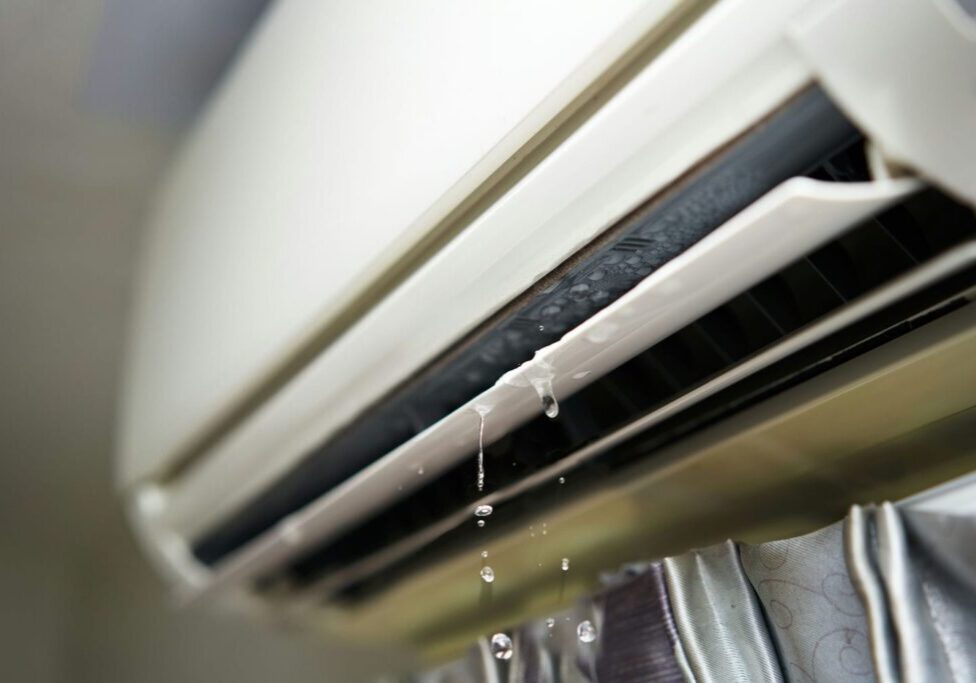
A ductless AC usually leaks water indoors because condensate is not draining where it should. The usual causes are a clogged drain line, dirty filters, an iced coil, poor unit slope, a cracked drain pan, a failed condensate pump, or an installation issue. If your ductless air conditioner is dripping from the indoor head, turn cooling off, protect the wall and floor, and check the simple airflow and drain clues before restarting.
A ductless AC leak happens when moisture removed from indoor air collects inside the indoor unit but does not drain away through the condensate path. That water should never run down your wall, drip from the front cover, or pool on finished flooring.
Here’s the catch: the unit may still cool while the drainage side has already failed. Do not treat indoor dripping as normal condensation.
Start Here: What To Do When Your Ductless AC Is Dripping Indoors
Your first job is damage control. Turn the unit off, protect nearby finishes, and avoid anything that makes the system create more water. A slow drip from a wall-mounted unit can still stain drywall, swell trim, damage paint, and leave a musty smell if it keeps returning.
Do not start by taking the unit apart. Ductless indoor heads are compact and contain delicate plastics, controls, coils, and drainage parts. A careful first check helps. Improvised repair can make the leak worse.
Turn Cooling Off And Protect The Wall
Turn the unit off at the remote, controller, or wall control. Then move furniture, electronics, rugs, wall art, and stored items away from the leak path. Use towels, a tray, or a bucket where practical, but do not let that become the long-term fix.
Water behind the indoor head is not normal. If it gets into the wall cavity, the repair can move beyond HVAC and into drywall or finish damage. Act early, even if the drip looks minor.
Do Not Keep Lowering The Temperature
Lowering the setpoint will not clear a clogged drain, fix a bad slope, thaw a coil safely, or restart a failed condensate pump. It usually makes the unit run longer. That means more condensate and more water trying to leave through a path that already is not working.
The unit may still blow cool air for a while. That does not mean it is safe to keep running. If water is coming from the indoor head, the drainage side needs attention.
Check Whether The Leak Is Active, Occasional, Or Only After Shutdown
Pay attention to timing. Active dripping during cooling often points to drainage, slope, or pump trouble. Leaking after shutdown can point to an iced coil thawing. Leaking only during humid weather can point to a marginal drain setup that cannot keep up.
That timing is useful. Tell the technician when the leak starts, how long the unit has been running, and whether cooling performance changed. Those details narrow the diagnosis faster.
Why A Ductless AC Produces Water At All
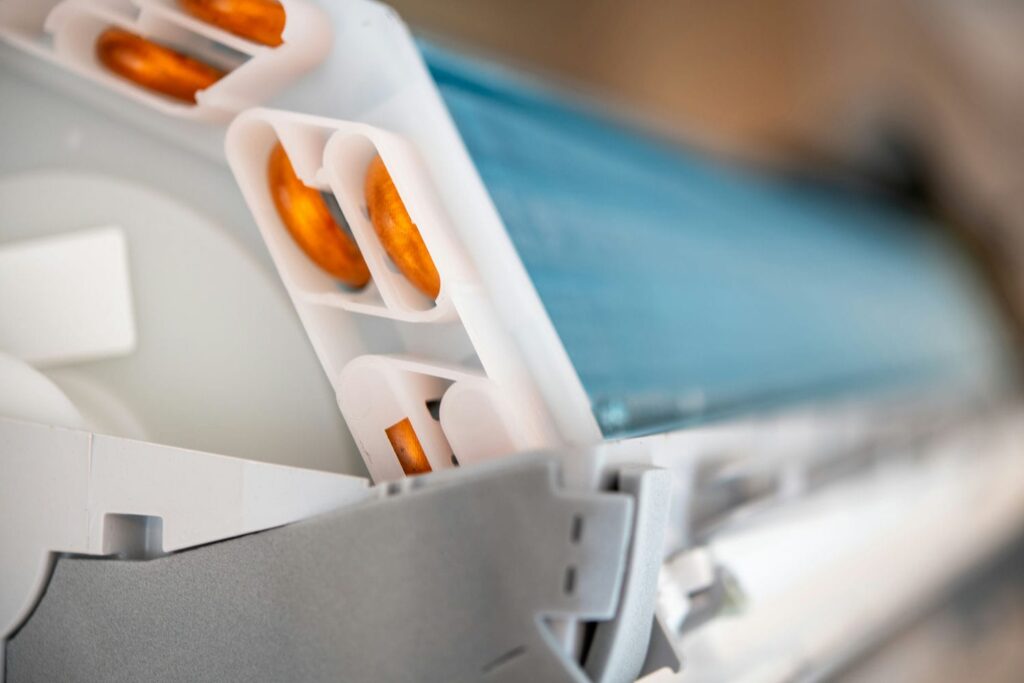
A ductless system cools air and removes humidity at the same time. Moisture from indoor air condenses on the indoor coil, collects inside the unit, and should drain away through a condensate line or pump. Natural Resources Canada explains how a heat pump dehumidifies indoor air during cooling, with moisture condensing on the indoor coil, collecting in a pan, and draining away through a condensate drain.
That means water is part of normal operation. The problem is not that the system creates water. The problem is that the water is showing up in your room.
Condensation Is Normal; Water On Your Wall Is Not
A ductless AC should create condensate during cooling. That water should move through the unit’s drain system and leave the home safely. It should not drip from the front cover, bottom edge, wall sleeve, ceiling cassette, or the wall behind the unit.
So, no, “a little indoor drip” is not normal. Condensate inside the drain path is normal. Water on drywall, flooring, furniture, or trim is a fault.
Ductless Leaks Are Different From Central AC Leaks
Central AC leaks often show up near the furnace, indoor coil cabinet, drain pan, condensate pump, or basement floor. Ductless leaks usually appear at the wall-mounted head, ceiling cassette, drain line exit, or small condensate pump. That difference matters because the damage path is different.
If the water is showing up around a furnace or central AC coil instead, the checks for AC leaking water cover drain pans, furnace-room leaks, and central condensate issues that follow a different damage path.
Quick Diagnosis Table: What Your Ductless Leak Usually Points To
The symptom you notice usually points to a likely cause, though it does not confirm the failed part on its own. A proper service visit should still check filters, coil condition, drain path, slope, pump operation, and installation details.
| What You Notice | Most Likely Cause Bucket | Safe First Check | Best Next Step |
| Water Drips From Front Or Bottom Of Indoor Head | Clogged Drain, Poor Slope, Or Dirty Unit | Turn Off Cooling, Check Filters | Book Service If It Returns |
| Leak Appears After Weak Cooling Or Ice | Frozen Coil Thawing | Turn Unit Off And Let It Thaw | Diagnose Airflow Or Refrigerant Issue |
| Leak Happens Mostly On Humid Days | Marginal Drainage Or Dirty Filters | Clean Filters, Note Timing | Service If Repeated |
| Water Runs Down Wall Behind Unit | Drain Line, Wall Sleeve, Or Installation Issue | Protect Wall, Stop Cooling | Book Diagnosis |
| Pump Hums Or Runs Constantly | Condensate Pump Issue | Visual Check Only | Book Repair |
| Musty Smell With Dripping | Standing Water Or Dirty Indoor Unit | Stop Cooling, Document Smell | Clean And Diagnose Drainage |
The pattern matters. A one-time drip after heavy humidity points one way. A repeated leak from the same indoor head points another. Water behind the wall is the most urgent because you cannot see where it is going.
8 Common Reasons Your Ductless AC Is Leaking Water
Water is the symptom, not the diagnosis. The source is usually hidden inside the drain path, behind the indoor head, or in the airflow and coil condition. That is why wiping the wall dry does not solve much.
Start with the common causes first. Dirty filters and a clogged drain are simpler than refrigerant or installation problems. However, if the leak returns after basic checks, stop treating it like a surface issue.
1. The Condensate Drain Line Is Clogged
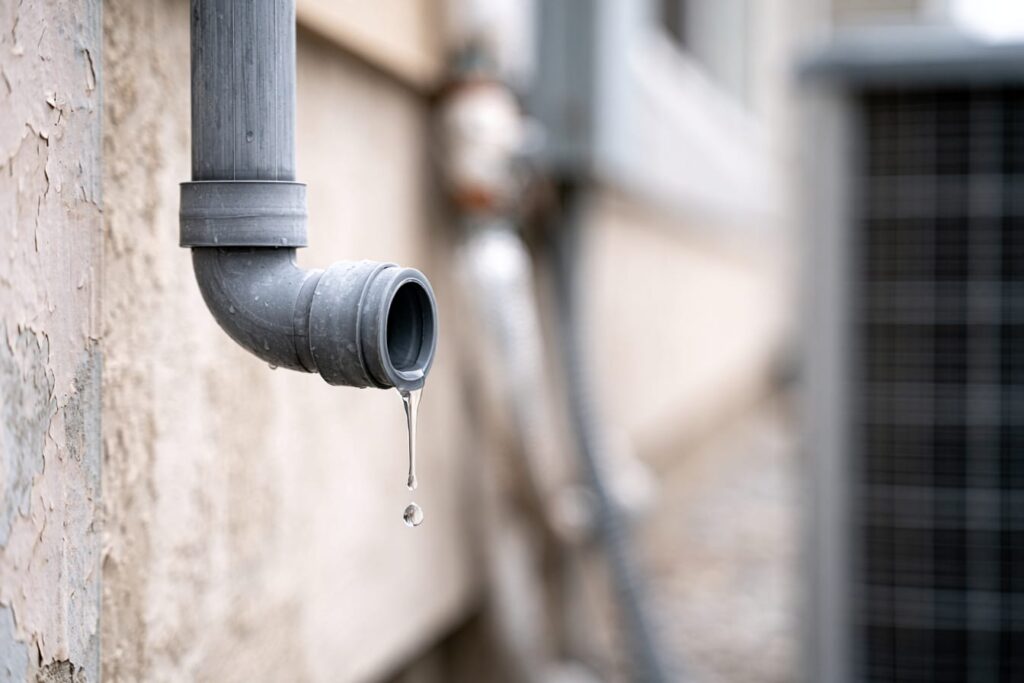
A clogged drain line is one of the most common causes of ductless indoor leaks. Dust, biofilm, insects, algae, and debris can restrict the small drain path. Once water cannot leave fast enough, it backs up inside the indoor unit and spills out.
You may be able to see the outdoor drain outlet, but that is not the same as clearing the whole line. Do not force tools, harsh chemicals, or compressed air into an unfamiliar drain setup. A blocked or hidden line needs proper service.
2. The Indoor Unit Or Drain Line Is Not Sloped Correctly
Many ductless indoor heads rely on gravity to drain water. If the unit is not level, the line has poor slope, or the drain route has a sag, water can sit instead of moving out. That standing water eventually finds another path.
This matters in Toronto condos, additions, and finished rooms where drain routing can be tight. A slope problem is not solved by cleaning the filters. It needs correction to the mounting or drain path.
3. Dirty Filters Are Restricting Airflow
Dirty filters reduce airflow through the indoor head. Less airflow can make the coil too cold, weaken cooling, and contribute to icing. When that ice melts, water may overflow or drip indoors.
Clean washable filters according to the manufacturer’s instructions. Let them dry before reinstalling them. If clean filters do not stop the leak, the problem is deeper than basic maintenance.
4. The Indoor Coil Is Dirty Or Iced Up
A dirty indoor coil can hold moisture, restrict heat transfer, and create poor drainage behaviour. An iced coil can make the leak worse because thawing ice releases water quickly. That water may overwhelm a marginal drain path.
If you see frost, ice, weak airflow, or leaking after the unit shuts off, working through why your air conditioner keeps freezing up helps you trace the thaw. Keep the ductless unit off until the cause is diagnosed.
5. Refrigerant Or Sensor Problems Are Causing Freeze-Thaw Leaks
Low refrigerant, sensor problems, or control issues can make the indoor coil run too cold. The visible symptom may be water dripping from the indoor head, but the real trigger may be a cooling-side issue. That is why not every leak is just a drain problem.
Do not add refrigerant, open sealed sections, or try to diagnose the cooling circuit yourself. Refrigerant and sensor work needs proper tools and training. Clearing the drain will not solve a leak if the unit keeps icing.
6. The Condensate Pump Is Failing Or Misbehaving
Some ductless systems use a condensate pump because gravity drainage is not practical. If the pump sticks, hums, runs constantly, loses power, or fails, water can back up and leak from the indoor unit or nearby wall area. A pump problem can look like a drain problem from the room.
This is common in retrofits where the indoor head is far from a simple exterior drain route. The pump, float switch, reservoir, power, and discharge line all need to be checked together.
7. The Drain Pan Or Internal Drain Parts Are Cracked, Loose, Or Dirty
Inside the indoor head, water must collect and move through a narrow internal path. A cracked pan, loose fitting, dirty channel, or misaligned internal part can send water out the wrong way. The leak may start small and then become steady as the unit runs longer.
Do not disassemble the indoor head to hunt for the pan. Ductless units have delicate covers, coils, wiring, louvers, and clips. A small broken plastic tab can turn a leak repair into a larger repair.
8. The System Was Installed In A Tough Location
Some leaks come from installation constraints. Long drain runs, poor wall penetrations, uneven mounting surfaces, exterior drain exposure, tight condo routing, and pump-dependent layouts can all create future drainage problems. The unit may be fine. The water path may not be.
This is where ductless experience matters. A leak can be a repair issue, an installation correction issue, or both. The right diagnosis checks the equipment and the route water takes out of the room.
Why Ductless Leaks Show Up In Toronto Homes And Condos

Ductless systems are popular in homes where ducts are limited or where one area needs targeted cooling. That includes condos, additions, sunrooms, hot second floors, garage conversions, and older homes. Those are also the spaces where leaks can damage finished walls and floors fast.
Toronto humidity adds pressure. During sticky stretches, the system pulls more moisture from the air. A drain route that barely works in mild weather can fail once condensate volume increases.
Wall-Mounted Heads Put Water Near Finished Surfaces
A central AC leak often lands near a furnace or concrete basement floor. A ductless leak often lands on drywall, hardwood, furniture, window trim, or finished flooring. The same amount of water can cause more visible damage because the indoor head sits in the living space.
This is why damage control matters so much. Do not wait until the wall stains. If water is coming from the indoor head, shut cooling off and protect the area.
Condos And Retrofits Can Have Tight Drain Routes
Ductless systems solve comfort problems in places where ductwork is hard to add. However, that can mean tricky drain routing, wall sleeves, pumps, and limited exterior options. The cooling solution is clean only if the condensate path is also planned well.
If a leak starts soon after installation, slope, routing, pump setup, wall penetration, and mounting level should be checked. Do not assume the unit is defective before checking the way it was installed.
Humid Weather Exposes Marginal Drainage
Humid weather makes a ductless AC remove more moisture from indoor air. More moisture means more condensate. If the drain line is partly blocked, the pump is weak, or the slope is marginal, humid weather can expose the weakness quickly.
Humidity is not the root cause by itself. It is the stress test. The real issue is usually drainage, airflow, maintenance, or installation.
What You Can Safely Check Yourself
There are a few useful checks you can do without taking the system apart. Keep them simple: clean the washable filters, look for ice, check whether the unit is cooling properly, and inspect the visible drain outlet from a safe distance. Stop there.
A wall-mounted indoor head looks accessible, but that can be misleading. The parts behind the cover are compact and easy to damage. Your goal is to narrow the symptom, not force a repair.
Clean The Washable Filters
Turn the unit off, open the front cover carefully, and remove the washable filters. Clean them according to the manufacturer’s instructions, then let them dry before reinstalling them. Do not reinstall wet filters if the manual says they should be dry.
Clean filters can help if restricted airflow started the problem. They will not fix a clogged internal drain, bad slope, failed pump, refrigerant issue, or cracked internal drain part.
Check For Visible Ice Or Weak Airflow
Look for frost, ice, weak airflow, poor cooling, or a leak that appears after the unit shuts off. Those clues can point toward a freeze-thaw issue rather than a simple drain clog. A unit that leaks and cools poorly needs more than a wipe-down.
If the main symptom is poor cooling, the reasons an AC blows warm air walk through the cooling-performance side rather than the drainage side.
Check The Outdoor Drain Outlet From A Safe Distance
If the condensate drain exits outside and you can see it safely, check whether water is dripping during cooling. Also look for obvious blockage from dirt, insects, leaves, or damage at the outlet. This can help you tell whether water is leaving the system at all.
Do not push wire, tools, chemicals, or compressed air into the line. You can turn a partial clog into a leak inside the wall. If the outlet looks blocked or dry while the unit leaks indoors, book service.
Do Not Open The Indoor Head Or Use Harsh Drain Chemicals
Do not remove the indoor unit from the wall, open sealed sections, pour harsh chemicals into the drain, force compressed air through an unknown line, or touch wiring. A ductless leak can involve electrical controls, wall cavities, drain pumps, and delicate indoor parts.
A careless fix can create more damage than the original drip. If the simple checks do not solve it, the next step is diagnosis.
When To Call For Ductless AC Repair

Call when the leak returns, water enters the wall or ceiling, ice appears, the unit cools poorly, odour shows up, or the leak started soon after installation. Those clues tell you the problem is no longer a simple homeowner check.
The rule is practical. If the filters are clean and the leak repeats, the issue is likely in the drain path, coil, pump, refrigerant behaviour, or installation setup.
Call If The Leak Returns After Filter Cleaning
If the filters are clean and the leak comes back, stop treating the problem like routine maintenance. The drain line may be clogged, the slope may be wrong, the pump may be failing, or the coil may be icing. The leak is now a repeat symptom.
A repeat leak needs a real diagnosis. Otherwise, you risk wiping up the same water again while hidden moisture spreads.
Call If Water Is Entering The Wall Or Ceiling
Water inside drywall, ceilings, trim, or wall cavities should be treated as urgent. Health Canada advises fixing moisture problems immediately, because high humidity, leaks, water infiltration, and flooding can contribute to indoor mould growth.
Do not wait for a larger stain before acting. A ductless leak mounted high on a wall can send water behind finishes before you see the full damage.
Call If The Leak Comes With Ice, Weak Cooling, Odour, Or No-Start Behaviour
A symptom stack means the issue is bigger than a drip. Ice, weak cooling, musty odours, pump noise, or a unit that shuts down can point to airflow, coil, drainage, or control issues. The leak may be the visible part of a larger system problem.
If ice is visible or the leak follows a thaw, treat the freeze-up as the underlying trigger, then book service if the pattern repeats.
Call If The Leak Started Soon After Installation
If a new or recently serviced unit starts leaking, installation details should be checked. Mounting level, drain slope, pump setup, wall penetration, line routing, and outlet placement all matter. A new unit can leak if the drain path is wrong.
This is not about blame. It is about correcting the setup before it damages finished surfaces. The sooner the route is checked, the easier it usually is to fix.
What A Proper Ductless Leak Diagnosis Should Include
A proper ductless leak diagnosis should not stop at “the unit is dripping.” The technician should check airflow, filters, blower condition, coil condition, drain pan, drain line, pump operation, slope, wall routing, and signs of icing. That is the difference between wiping water and solving the cause.
You should finish the visit knowing whether the leak came from maintenance, drainage, installation, refrigerant behaviour, or equipment condition. A vague answer is not enough when water is running near finished surfaces.
Filter, Blower, And Coil Condition
The technician should check filters, blower wheel condition, coil condition, airflow, and signs of icing. Ductless units are compact, and dirt buildup can affect both cooling and drainage. A dirty blower or coil can create symptoms that look like a drain failure.
This is the first step because airflow and drainage problems can overlap. The water may be spilling from the front, but the trigger may be restricted airflow or a dirty coil.
Drain Pan, Drain Line, And Slope
The service visit should include the internal drain pan, visible drain line, slope, wall sleeve, outlet, and any sagging or routing problem. If water cannot leave by gravity, it will eventually find the wrong path. That path may be your wall.
This is the heart of a ductless leak diagnosis. The technician should confirm where water backs up, not just clean what is easy to reach.
Condensate Pump And Float Switch If Present
If the system uses a condensate pump, the technician should check pump operation, reservoir condition, float switch behaviour, power, discharge line, and noise. A pump that runs constantly is a clue. A pump that never runs can be one too.
This is especially important in condos and retrofits where gravity drainage is not simple. Pump-dependent installs need more than a quick filter clean.
Refrigerant And Sensor Review When Ice Is Present
If the indoor head shows ice, frost, weak cooling, or freeze-thaw leaking, the diagnosis should include refrigerant performance and sensor behaviour. Low refrigerant, sensor problems, and airflow restrictions can all cause the coil to run too cold.
Clearing a drain will not solve a leak if the real trigger is icing. That is why ice changes the diagnosis.
Installation And Placement Review
The technician should check whether the indoor head is level, mounted correctly, and draining properly for its location. The drain route should also make sense for the wall, exterior, ceiling, or condo layout. Placement matters because water follows gravity, not intention.
This is where ductless expertise matters. A wall unit leak often depends as much on the drain path as on the equipment itself.
Repair Or Reinstall? What The Leak Usually Means
Most ductless leaks are repair or correction issues first. A clogged drain, dirty filters, dirty coil, failed pump, loose fitting, or internal drainage problem can often be fixed without replacing the system. That is the repair-first path.
However, some leaks reveal an installation problem. If the drain was never sloped well, the pump setup is wrong, or the unit is mounted in a difficult spot, cleaning alone will not stop the leak for long.
Repair Usually Makes Sense When The Cause Is Isolated
Repair usually makes sense when the cause is clear and limited. That includes a clogged drain, dirty filters, dirty coil, failed pump, loose drain fitting, or isolated internal drainage issue. If the system otherwise cools well, the goal is to restore drainage and airflow.
This is the common path. Solve the cause, confirm the unit drains properly, and watch whether normal operation returns.
Installation Correction Makes Sense When Drainage Was Never Right
Installation correction makes sense when the leak started soon after installation, returns from the same wall path, or traces back to poor slope, long drain routing, weak pump placement, or wall-sleeve issues. In that case, the system may not be broken. The drainage setup may be wrong.
The correction could be drain rerouting, slope adjustment, pump work, wall penetration correction, or remounting the indoor head. The fix depends on where the water is backing up.
Replacement Enters The Conversation Only With Age Or Major System Decline
Replacement should be the last branch. It enters the conversation when the ductless system is older, has major component issues, repeated refrigerant problems, poor cooling, or repair costs that no longer make sense. One leak does not automatically mean the system is done.
If the unit is old or poorly installed and you are weighing next steps, the right diagnosis weighs system age, component condition, and repair cost before replacement enters the conversation.
How To Prevent Another Ductless AC Leak
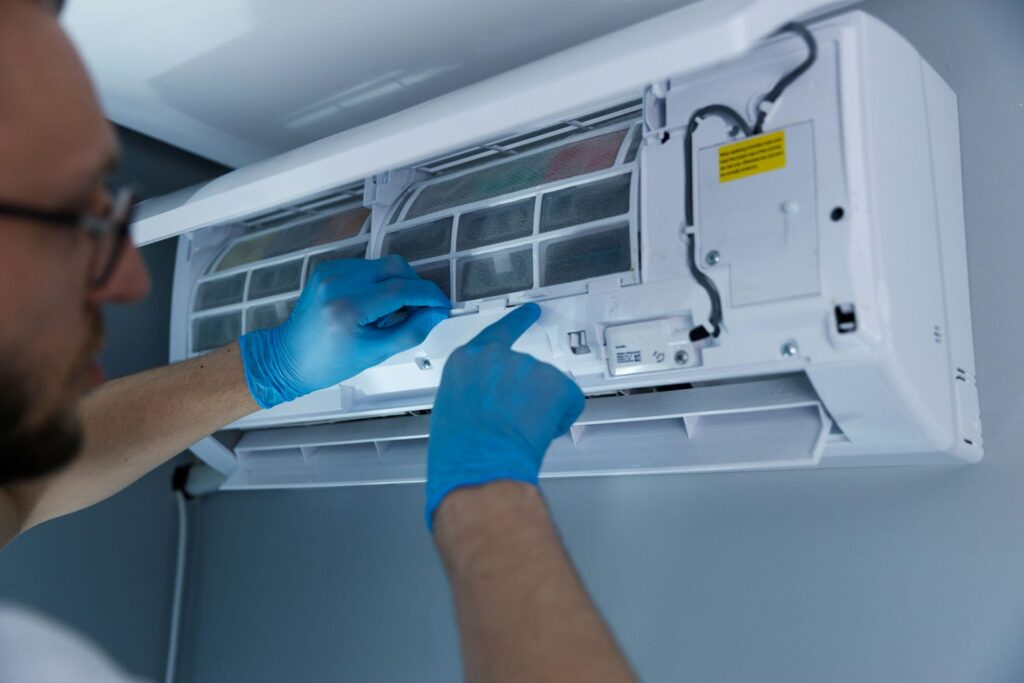
Prevention is simple, but it has to happen before humidity loads the system. Keep the filters clean, keep the indoor head clear, keep the drain outlet visible where possible, and book service before the unit has to remove moisture every day.
No maintenance habit prevents every leak. But good airflow and drainage checks reduce the odds that a small issue becomes water on a wall.
Clean Filters Regularly During Cooling Season
Check ductless filters more often during heavy cooling use, dusty conditions, pet homes, or renovation work. Dirty filters reduce airflow and can start the chain of problems that leads to icing and leaks.
The right interval depends on use and the manufacturer’s instructions. Do not wait until the unit smells musty or drips before checking.
Keep The Indoor Head Clear
Do not block the indoor head with curtains, shelving, plants, tall furniture, or stored items. The unit needs open airflow to cool, dehumidify, and drain properly. Crowding the unit can hurt comfort and make internal moisture problems more likely.
This is a simple habit, but it matters. Ductless systems work best when air can move freely through the indoor head.
Keep The Drain Outlet Clear
If the drain exits outdoors and is visible, keep the outlet clear of dirt, insects, leaves, ice, and physical damage. A blocked outlet can back water up into the room. That is a small exterior problem with an indoor consequence.
Keep this as a visual check only. If the line is hidden, awkward, or clogged inside, book service instead of forcing the drain open.
Book Maintenance Before Peak Humidity
A pre-season service visit can clean the indoor unit, check drainage, inspect the pump if present, and catch airflow or coil problems before the system has to remove heavy moisture every day. That timing matters in the GTA because humid stretches expose marginal drainage quickly.
The best time to catch a weak drain or dirty indoor head is before it leaks onto finished flooring. Maintenance gives you that chance.
Need Help With A Ductless AC Leak?
A ductless leak is usually fixable, but it should not be ignored, because the indoor head sits near finished walls, flooring, furniture, and trim. Cozy World has served GTA homeowners since 1991, is an Authorized Lennox Dealer, and uses factory-trained technicians to diagnose ductless and central AC issues plainly. If the filters are clean and the leak returns, our air conditioner repair team can check the drain path, indoor coil, pump, and installation setup properly.
If the leak points to an older ductless system, poor original placement, or a setup that never drained reliably, we can help with that decision too. Cozy World quotes clearly, with no HVAC cost surprises, and can walk you through the right next step for your ductless air conditioner without pushing replacement before the evidence supports it.
Frequently Asked Questions
Yes. Turn cooling off, protect the wall and floor, and do the safe checks before restarting. If water is entering the wall, ceiling, trim, or flooring, keep the unit off and book service. If the leak returns after the filters are cleaned, the problem is likely deeper than routine maintenance. It may involve the drain line, slope, pump, coil, or installation.
Water leaving through the drain is normal during cooling. A mini-split removes moisture from indoor air, and that water should leave through the condensate path. Water dripping from the indoor head, wall, ceiling, or front cover is not normal. A visible indoor drip means the water is not draining correctly. Treat it as a fault, not a harmless side effect.
Yes. Dirty filters can restrict airflow through the indoor head. That can make the coil too cold, contribute to icing, and create thawing water that leaks indoors. Clean the filters according to the manufacturer’s instructions. If the leak continues, the cause is likely beyond the filters.
Humid weather makes the unit remove more moisture from the air. A drain line, pump, slope, or dirty indoor unit that barely works in mild conditions may fail when condensate volume increases. Humidity exposes the problem. It is usually not the whole cause.
Yes, indirectly. Low refrigerant can contribute to coil icing. When the ice melts, water can leak if the drain path cannot handle it or if the indoor unit is already marginal. Refrigerant diagnosis is not DIY. If you see ice, weak cooling, and water together, book service.
You can check the visible outlet if it is safe and accessible. Do not force tools, harsh chemicals, or compressed air through an unfamiliar ductless drain line. You may damage the line or push water into the wall. A recurring clog should be serviced properly. The technician should confirm the drain path, slope, outlet, and pump if one is installed.
Installation should be checked if the leak started soon after installation, the unit seems out of level, the drain route is long or awkward, the pump runs constantly, or water runs behind the wall. Poor slope or routing can make a good unit leak. In that case, the fix may be installation correction, not simple cleaning. The drain path has to be made reliable.
Ready to Get an HVAC Service Quote?
Whether you have questions, need assistance, or want to schedule a service, we're here to help. Don't hesitate to contact us anytime.
