Where Should Your Heat Pump Go? Outdoor Unit Placement That Works In Toronto
November 29, 2025 | Category: Air Source, Heat pump, Installation, Retrofit

For most Toronto homes, the best spot for your heat pump’s outdoor unit is a side or back location with clear airflow, solid snow clearance, space for service, and distance from bedrooms and neighbour windows. The wrong spot can mean more noise complaints, icing, and higher bills; the right spot runs quietly in the background for 10–15 years. If you want placement handled as part of a full design, start with our heat pump installation service so siting, sizing, ducts, and electrical are planned as one job.
Heat pumps are very forgiving when you choose the right model and location, and surprisingly fussy when you don’t. Toronto’s narrow side yards, laneways, and packed backyards make placement more than “where the old AC was.” In this guide, we’ll show you how we think about outdoor unit placement in real GTA homes so you can spot good options before anyone starts drilling.
What Makes a Good Outdoor Location?
Four Things Every Good Location Has
Every good outdoor spot checks four boxes: air, snow, noise, and access. First, the unit needs clear airflow on all sides so it can breathe. That means no tight alcoves, solid fences right up against the coil, or deck joists blocking discharge. If the unit is sucking in its own exhaust, efficiency and capacity drop fast.
Second, it needs snow and ice clearance. In a Toronto winter, drifting snow and freeze–thaw cycles can block coils or fans if the unit is set too low or too close to high‑drift corners. Raising the unit on a stand and staying out of roof drip lines solves most of this. Third, it needs distance from bedrooms and neighbour windows so the small amount of noise it makes stays in the background. Finally, it needs safe access for service so a tech can reach it with tools in hand without climbing over planters or snowbanks.
When all four are in place, the unit can run long, quiet cycles without fighting the site. The fan has air to work with, defrost water has somewhere safe to go, neighbours are happy, and future maintenance is straightforward.
Top Spots We Use Most Often (Side, Back, Or Corner)
In a typical detached Toronto home, the best locations are a side yard near the driveway or a rear corner of the yard near the foundation. Side yards often make service easy because there is already a path from the front. They also allow short line‑set runs back to the mechanical room. The catch is proximity to your neighbour’s windows and lot line, which we’ll address in a moment.
Back corners can be very quiet and visually discreet, especially when you have a bit of distance from patios and seating areas. They work best when we can still get a fairly direct line path back to the indoor unit and keep drainage away from walkways. Sometimes we take a small hit on line length to avoid sitting a unit right outside a bedroom.
Front‑yard installs are possible, but they are usually a last resort. When we do use them, we plan screening carefully, maintain clear airflow above and around the unit, and respect sightlines and any municipal or HOA rules. The unit should still be easy to reach and not blow air across front steps.
When Your First Choice Won’t Work
Sometimes the obvious spot is not the smart spot. Property‑line setbacks, bedroom windows, gas meters, downspouts, and existing decks all limit what we can do. In tight semis or townhomes, side yards may be too close to neighbour windows to be neighbour‑friendly, even if they look convenient.
In those cases, we look for a “second best” location that balances noise and performance. That might be a slightly longer line run to the back yard, a raised stand to stay out of snow, or a wall bracket to get the unit out of a drift path. When ducts, electrical, or existing AC pads are involved, we sometimes consider a different kind of system altogether, such as a ductless heat pump in specific rooms or a different air source heat pump configuration. You can see how we approach system choice on our Air Source Heat Pump page.
If your home has little or no ductwork, the process changes again and we often look at ductless heat pump options that use multiple small outdoor units or multi‑split systems with shorter line runs.
Understand The Rules – Noise, Clearances, And Permits
Toronto’s Noise Rules for Heat Pumps and ACs
In Toronto, heat pumps and air conditioners are treated as stationary sound sources and “residential air conditioners” in Chapter 591 of the City’s Municipal Code. The Noise Bylaw sets sound limits for these stationary sources, which are measured at a point of reception on the neighbouring property, not at the unit itself. In plain language, what matters is what your neighbour hears in or near their home, averaged over a period, not the number on the equipment label alone.
The bylaw references provincial environmental noise guidelines for stationary and transportation sources, which are based on decibel limits related to the ambient sound environment. Ontario You do not need to become an acoustical engineer, but you do want to place the outdoor unit where its sound has the least chance of becoming a problem. That usually means away from bedroom windows and neighbour patios, using the house or fencing as a partial sound screen.
Planning for Toronto’s noise expectations at design time is easier than responding to a complaint after the fact. If you are already dealing with a noisy neighbour’s equipment, the City’s noise page explains how to report issues with residential air conditioners and other stationary sources.
Clearance To Walls, Windows, And Property Lines
Every heat pump has clearances printed in its installation manual. These include minimum distances from the back and sides of the unit to walls or obstructions, plus recommended clearance above and in front of the coil. In general, you want at least an arm’s length of clear air in front of the discharge, and enough side and rear space that the unit is not recirculating its own exhaust.
Windows and property lines are practical concerns. A unit blowing straight at a bedroom window will feel louder, even if it technically meets bylaw limits at the point of reception. A unit hard up against a side fence may be difficult to service and can trap snow. In narrow Toronto lots, we pay particular attention to how close we are to your neighbour’s windows and outdoor spaces and may favour a rear corner or different wall to reduce exposure.
Property‑line distances are primarily about access, airflow, and fire safety, while noise compliance is about what’s heard, not strictly how many metres away the unit sits. That’s why we do not simply push units to the farthest corner and call it a day; we look at where people actually sleep and spend time.
Do You Need A Mechanical Permit For Placement Changes?
For a simple like‑for‑like replacement of an outdoor unit in the same location, a building permit isn’t always required. However, new installations, major relocations, or work done as part of a larger renovation can fall under a stand‑alone mechanical (HVAC) permit or a mechanical permit tied to a building permit. The City’s mechanical permit guides explain what drawings and calculations are required, including equipment type, location, and heat‑loss/heat‑gain calculations.
The key point is simple: if you are already working with a designer, architect, or contractor on a bigger project, make sure the heat pump and its placement are shown clearly in the permit set. If the only work is adding or swapping a heat pump, check the City’s latest guidance or ask us to coordinate with your contractor so there are no surprises.
Picking The Best Side of The House
Side Yard Vs Back Yard
Side yards are usually the first choice because they are close to the mechanical room, often near existing AC pads, and easy for technicians to reach with tools. They can also hide the equipment from street view. The main concerns are airflow in narrow spaces, proximity to neighbour windows, and snow from driveways or roofs.
Back yards can be quieter and more flexible, especially if you have a decent amount of space away from decks and patios. A rear corner gives you distance from bedrooms and the street, and it can make noise almost disappear into background sounds. The trade‑offs are longer line‑set runs, possible obstructions from landscaping, and making sure there is still a clear path through snow for service.
In many GTA homes, we pick between a side yard and a rear corner based on real‑world constraints: windows, downspouts, gas meters, air intakes, and how you actually use your outdoor space. There is rarely a single perfect answer; there is usually a “best overall” location once everything is considered.
Corner Lots, Driveways, And Front‑Yard Options
Corner lots introduce more potential points of reception. You may have sidewalks and pedestrians on two sides and neighbours oriented differently than in a mid‑block lot. In these cases, we are careful not to sit a unit where it will blow directly across a sidewalk or point at a neighbour’s front porch.
Driveways are a double‑edged sword. Putting the unit near the driveway can make access easy, but it also exposes the unit to car exhaust, road salt, and snow off vehicles. We choose stands and orientations that keep coils out of the worst spray and leave enough clearance so vehicles can manoeuvre comfortably.
Front‑yard placement is usually a last resort when side and back options are blocked by decks, additions, or severe access limits. When we go there, we use slender line‑set covers, thoughtful screening (like open slatted fencing or shrubs), and careful routing so the equipment looks intentional rather than tacked on.
Townhomes, Semis, And Tight Right‑Of‑Way
Townhomes and semis bring tight side yards, shared driveways, and sometimes shared walls. In these cases, we pay close attention to the neighbour’s bedrooms and patios, not just yours. It may be worth adding a metre or two of line length to tuck a unit into a rear corner where it will be heard less.
In older Toronto stock, retrofits can be especially tricky. Existing AC pads may be in noisy or icy locations, and mechanical rooms can be deep in the house. In some cases, the smarter move is to rethink the whole layout of how central air or heat pumps are retrofitted rather than blindly reusing old positions. We walk through these trade‑offs in more detail on our Retrofitting Central Air Heat Pump In Toronto article. https://www.cozyworld.ca/retrofitting-central-air-heat-pump-in-toronto/
Height, Mounting, And Vibration

Ground Pads Vs Raised Stands In Toronto Winters
Ground pads used to be the default. In Toronto’s snow and freeze–thaw cycles, we now favour raised stands in most cases. A raised unit stays above typical snow depth and slush, keeps defrost water from pooling under the base, and makes coil cleaning easier. The structure under the stand matters too; pads should be stable and level so the compressor doesn’t vibrate or walk.
We choose height by looking at historical snow in your yard, roof runoff, and surrounding grade. The goal is to keep the unit high enough that it doesn’t sit in a snowbank, but low enough for easy service access. We also pay attention to how water will drain off the pad or stand so it does not create ice where you walk.
In some sheltered locations, a low pad can still be acceptable, especially for smaller ductless systems under overhangs. Even then, we avoid locations where drifting snow or roof avalanches can bury the unit.
When Wall Brackets Make Sense (And When They Don’t)
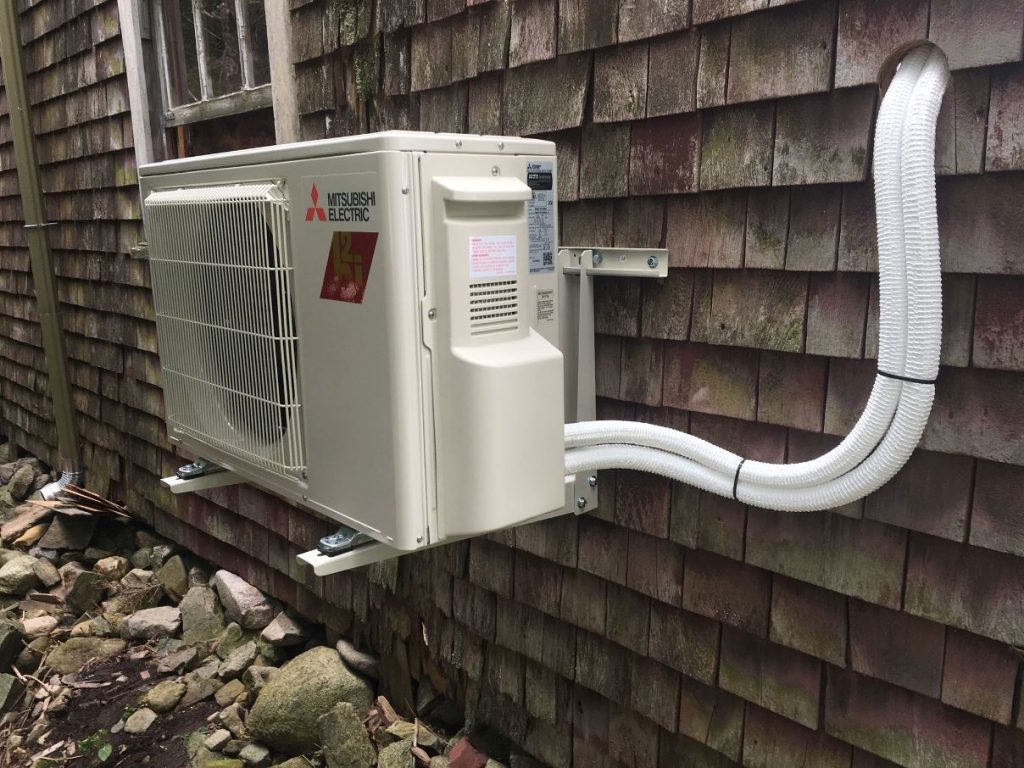
Wall brackets are useful when ground space is limited or when snow drifting is severe. Mounting a unit on a foundation wall keeps it above drifts and away from splashing water. It also allows water to drip clear of footpaths. However, not all walls are equal. We avoid flimsy cladding and try to anchor into solid masonry or concrete.
Wall mounting is less attractive when the wall backs onto a bedroom or quiet living space. Even with vibration isolation, some sound can transfer. We also avoid mounting units in locations where service ladders would block narrow walkways or pose safety issues. When brackets make sense, we select robust hardware, use proper anchors, and include rubber isolation between the bracket and the unit feet.
Vibration Isolation To Keep Things Quiet Inside
Vibration is the hidden noise problem. A relatively quiet outdoor unit can become annoying if vibration transmits through a deck, thin wall, or poorly supported stand. We use rubber or neoprene isolation pads, rigid stands with diagonal bracing, and line‑set supports that prevent pipes from rattling.
These details matter because Toronto’s noise rules judge sound at the point of reception, and people notice low‑frequency hums at night. Proper isolation, careful routing of lines, and avoiding resonant surfaces keep that hum from ever becoming an issue.
Line Sets, Electrical, And Indoor Connections
How Far Can the Outdoor Unit Be from the Indoor Unit?
Every manufacturer sets maximum line‑set length and vertical separation between indoor and outdoor units. Running near these limits can reduce efficiency and may require adjusting refrigerant charge. As a homeowner, you don’t need the exact numbers, but you should know that “anywhere” is not true; physics and manufacturer engineering still apply.
In most GTA homes, the sweet spot is a short, direct run with minimal bends, avoiding big changes in elevation. That usually encourages side or back placements near the mechanical room. When we recommend a more distant location for noise or aesthetic reasons, we check the manufacturer’s sizing and selection guides and design within their limits. Natural Resources Canada’s air‑source heat pump sizing and selection guidance is one of the references that underlines this need to respect manufacturer limits.
Routing Lines Without Ruining Your Exterior
A tidy line‑set route is part engineering, part design. We look for paths that:
- Follow corners or downspouts.
- Use painted line‑set covers that blend with siding or brick.
- Minimise long exposed runs across prominent facades.
In many Toronto homes, the best answer is to drop into the basement quickly, run through joist spaces, and pop out near the indoor unit. On brick exteriors, we take care with penetrations to keep water out and preserve the look of the wall. The goal is to make the equipment feel integrated, not bolted on.
Planning Electrical And Condensate Together
Placement and routing also affect electrical and condensate. The outdoor unit needs a dedicated 240‑V circuit and a properly located disconnect. Choosing a spot that allows neat conduit runs, avoids front‑façade clutter, and stays within practical distances of the panel makes the electrical work cleaner.
Condensate from indoor units or cassettes also needs somewhere to go. When we tie interior placement and exterior routing together, we can keep pumps and drains simple, reliable, and hidden. For deeper details on panel capacity, breaker sizing, and Electrical Safety Authority notifications, see our separate electrical readiness guide so we don’t repeat those details here.
Special Cases – Balconies, Roofs, And Multi‑Unit Buildings
Can You Put A Heat Pump On A Balcony?
In condos and apartments, balconies often look like obvious spots. In reality, many condo boards either restrict or outright ban mechanical equipment on balconies because of structure, noise, and safety. Even when technically possible, balcony units can blow warm or cold air at neighbours and make small spaces uncomfortable.
If you are in a condo or multi‑unit building, check your declaration and building rules before planning a heat pump. Property managers may require structural review, specific mounting methods, and proof that noise will stay within the building’s expectations. We work with these constraints but never assume balcony installs are automatically acceptable.
Rooftop Or Garage Roof Locations
Rooftop or garage‑roof installations are sometimes used in townhome rows, laneway houses, or buildings with very limited ground space. They keep equipment out of sight and away from patios but add concerns: structural loading, wind, snow drifts, and safe access for service.
If we do recommend a roof location, we plan for:
- Proper structural support and load paths.
- Vibration isolation so sound does not telegraph into living spaces.
- Safe ladder or hatch access for technicians in all seasons.
Because of this complexity, we rarely put single‑family units on roofs unless there is a compelling reason and the structure and access are clearly appropriate.
Shared Courtyards And Common Areas
In some townhome and condo developments, outdoor units live in shared courtyards or utility areas. Here, thoughtful layout matters even more. You may have multiple units in a small space, and one bad placement can affect everyone.
We plan common‑area layouts so units:
- Have enough airflow and do not blow exhaust into each other.
- Respect each resident’s windows and patios as points of reception.
- Maintain clear service routes that don’t require climbing over other equipment.
Early coordination with the condo board or neighbours prevents conflicts and avoids the need to move equipment later.
Placement Options At A Glance
| Location Option | When It Works Well | What To Watch For |
| Side yard near driveway | Easy service, short line runs, hidden from the street | Distance to neighbour bedroom windows, property line, snow off driveway and roof |
| Back corner of yard | Quieter, away from street, flexible screening options | Access through snow, landscaping, fence clearances, line‑set length |
| Under a deck (rarely ideal) | Only if deck is high and open on all sides | Restricted airflow, snow drop, defrost steam and moisture under the structure |
| Balcony or rooftop | Mostly multi‑unit or special cases | Structural limits, condo rules, safe access, wind, noise to other units |
| Front yard with screening | Last resort when sides/back are blocked | Sightlines, municipal or HOA rules, longer line runs, airflow behind screening |
How Cozy World Designs Placement For GTA Homes
Site Walk And Constraint Mapping
Our work starts with a walk around your home, not a guess on a sketch. We look at bedroom and living‑room windows, neighbour patios, fences, decks, downspouts, and driveways. We also note where your current AC or mechanical equipment sits and whether that location was ever a good idea.
From there, we map 2–3 candidate locations and explain the trade‑offs in plain language: which one is quietest, which one is easiest to service, and which one keeps line runs sensible. We also discuss where defrost water will go in January, not just how it looks in July.
Balancing Performance, Noise, And Aesthetics
Once we have candidate locations, we check them against the equipment we’re proposing. We confirm that line‑set lengths and elevation differences stay within manufacturer limits and that the location will hold up in Toronto’s winter weather. We also factor in municipal noise expectations for stationary sources and your own tolerance for sound around patios and bedrooms.
On top of that, we pay attention to curb appeal. Line‑set covers, stand design, and screening are chosen to blend with your home instead of fighting it. Guidance from Natural Resources Canada on heat pump sizing and installation best practices dovetails with this balanced approach: pick the right equipment and install it in a way that works with the home, not against it.
A Documented Plan Before We Drill
Before we start drilling holes, we confirm final placement, mounting type, line‑set path, and electrical/disconnect location with you. We mark out stands or pads and talk through drainage and snow. If any permit considerations apply, we flag them and coordinate with your contractor or designer so nothing gets missed.
This documented plan becomes part of your job file, alongside commissioning readings and equipment details. Future you-and any technician who comes later-has a clear record of why the unit is where it is and how it was designed to work.
Get A Placement Plan Before You Commit
Where you put the outdoor unit effects noise, winter reliability, and neighbour relationships for as long as you own the system. It’s worth getting right the first time. If you’d like a clear yes/no on your preferred locations and a shortlist of better options, book a quick consultation. Cozy World has served the GTA since 1991, is an Authorized Lennox Dealer, and our installers are factory trained, TSSA and HRAI registered, insured and bonded, with an A+ BBB rating and hundreds of 5‑star reviews. We’ll walk your property, map viable locations, and include a placement plan as part of a full heat pump installation quote.
FAQs
In most Toronto homes, the best place is a side or back location on a stand with clear airflow, snow clearance, and easy service access. We look for spots that are not directly under roof valleys, not blowing at bedroom windows, and not crowding neighbour patios. The exact answer depends on your lot shape, windows, and where the indoor equipment sits.
Manufacturers set minimum technical clearances to walls and obstructions, and the city regulates noise based on what your neighbour hears at their point of reception, not a fixed distance. We site units to respect both: enough space to breathe and enough separation so the sound that reaches next door stays within Toronto’s Noise Bylaw expectations. For details, you can review the City’s noise information for stationary sources and residential air conditioners.
Sometimes, but it is rarely ideal. The deck must be high and open enough on all sides for the unit to draw and discharge air freely, and snow or ice must not fall directly onto it. Even then, defrost steam and moisture can collect under the structure. In many cases, it is better to place the unit beside the deck on a stand where it has clear airflow and drainage.
In snowy climates like Toronto, we usually mount outdoor units high enough to stay above typical snow and slush, while keeping them low enough for safe service. The exact height depends on your yard, exposure to drifting snow, and the specific equipment. The goal is simple: keep coils and fans out of snow and ice, and give defrost water a safe path away from walkways.
Modern heat pumps are much quieter than older ACs, but placement still matters. Toronto’s Noise Bylaw assesses sound at your neighbour’s point of reception, such as outside a bedroom or on a patio. We choose quieter equipment where needed, orient the unit away from sensitive areas, and use stands and isolation so sound stays in the background.
In condos and multi‑unit buildings, some balcony and rooftop installations are allowed, but they are tightly controlled. You may need sign‑off from your condo board, structural review, and assurance that noise won’t impact other units. On single‑family homes, roof installs are possible but less common; they demand structural support, good vibration control, and safe access for service.
Some HVAC work, especially new or relocated exterior equipment as part of a larger project, may require a stand‑alone mechanical (HVAC) permit or a mechanical permit tied to a building permit. The City’s guides outline when mechanical permits apply and what documentation is required, including equipment type and location. When in doubt, check the current guidelines or ask us to coordinate with your designer or contractor.
Ready to Get an HVAC Service Quote?
Whether you have questions, need assistance, or want to schedule a service, we're here to help. Don't hesitate to contact us anytime.